Thursday, January 30, 2014

Gelli Printing and Art Journal Pages

I have spent the last two days from early until late in my studio playing and working, learning and smiling.  I spent Wednesday from 6:00 AM until 4:00 PM making prints with my Gelli plate.  Below are a couple of photos of some of the prints I made.  Not pictured are the envelopes, some of which turned out just pretty dang awesome!!


I tried a wide assortment of paper: Kraft paper, plain copy paper, deli wrap sheets (Kabinet Wax), book pages, sheet music, colored paper and the aforementioned envelopes.  I had just gotten in a box of 100 white 6X9 envelopes to use for mailing art back and forth, and I grabbed a handful of them to experiment with.  I have about decided I need to make myself a mail art journal, and I may include one or two of my favorites.

Once I finished cleaning up the mess (and it was a significant one!) I settled in to work on my pen-friend's art journal!  I used several of the prints in it and I have to say I am the happiest I have ever been with my art on this first page. (you can click on the image to enlarge it)

Here it is without the tag in the pocket.

The front of the tag.
The back of the tag.
The second page celebrates our pen-pal relationship and our love for "snail mail"

This tag is one I made for the little pocket she had on the inside cover.

It is ready to go out in tomorrow's mail! 

Tuesday, January 28, 2014

A Little Art, A Little Organizing, A Little Destruction...

Well, I have a few photos to share from the past few days.

 I got a few new paints this past week, and I had to make some room for them.  Much reorganizing ensued, and this drawer got a serious makeover!  This is the after picture, I didn't take one before!

 My new Gelli-printing plate has all kinds of potential, but my learning curve seems to be fairly steep.  So, I joined a new group on Swap-Bot called The Print Shop, and it's all about Gelli print making!  They have a swap up for some hand-made stencils, and this was my first effort.  I found some fairly thick clear plastic and cut until I raised a blister.  I drew the feather, then cut it with an exacto knife.  I made two different attempts at it, and still didn't get it like I wanted it, but I think good enough for the swap.  I will play with it some more when I can feel my finger again! :P

 My pen-friend Karen and I decided to do a private swap for a 5X7 card.  This is what I made for her.  All the inchies and twinchies (1 and 2 inch squares) are cut from my first set of Gelli prints, then I embellished them all and put them on a collage of vintage maps that I sprayed with some ink.

 This and the next ATC are both made on Gelliprint backgrounds.  I had such a great response from the first one I made with the "violets" on it, that I made these for two different Swap-Bot swaps. The flowers are cut from a piece of sheet music I painted with twinkling H20 watercolors.


 Awhile back I made a master board (large collage to be cut into smaller pieces) and this was the last remaining ATC.  I added quite a few little scraps, the "spunky" flag and some glass bead gel on the leaf, hat and little key part that is cut out of gold card at the bottom.  It was snatched right up as soon as I posted it for trade. :)
 This ATC is on a background someone sent me in a swap.  The little scalloped edge piece is the back of a note that came in another swap.  I used ink and Fancy Pants rub-ons that I bought when a local scrapbook store went out of business about three or four years ago.  Still trying to use up my stuff!

This last piece is a 4X6 post card for a Swap Bot swap for red postcards.  It has a lot of different pieces of printed and painted papers, washi tape, baker's twine, calendar photos, and all sorts of mediums applied, from crackle paint to liquid laminate, glitter, ink, acrylic paint and tiny silver glass beads.

As for the title's "destruction" here is my tale.  Today I had to tackle the mound of dishes in the kitchen or face dire consequences.  Apparently among the dishes was the cap for a jelly jar I had emptied a day or two ago.  Did you know that jar lids and disposals are not compatible?!  The disposal won, the lid is in the trash, the jar is topless (gasp!) and likely destined for the recycle bin. So sad. :(

Friday, January 24, 2014

Weaving paper and yarn

This week I have been trying to catch up.  But, as the old saying goes, the faster I go, the behinder I get!  So, I finally just quit trying and decided to play for a while. :)

Violets ATC.  Background is sheet music painted with twinks, violets punched from several layers of paper, topped with sheet music painted with twinks.  Added washi tape (of course!) some liquid pearl in the flower centers and some scrapes through white acrylic paint with a credit card.

This one is pieced from various papers I had either painted or received in swaps.  The little houses are washi tape.  I used some glitter gel pens to draw on the little flowers in the field, and some white acrylic on my finger around the edges.  I am liking that messy edge look for some reason.

These two orange backgrounds were in a swap I received last week, and I was feeling the love for them when I was creating, so I used them in both backgrounds.  The heart came as an extra in a swap with one of my favorite swappers, (Hi, Julie!) :) and I liked the look so well, I made a second one.  Both swapped right away.
The weaving on the ATCs above is from the edges of the sheet music I had painted.  I use every last little scrap of those painted papers!!

And, speaking of weaving, Elizabeth whipped out this shawl for my sister Mimi in no time at all!  It was difficult because she had to hand weave every line (as opposed to using her long hook) but it went so fast because she skipped two nails each pass, that it was only on the loom three days!  She only works on these when she comes for coffee in the morning and after she eats lunch, so about an hour a day.


The yarns are purple eyelash and ombre bamboo with purple and chartreuse streaks in it.  Here is a close up of the weave.


And, here is the finished product.  No fringe was needed as the hairy yarn does a nice job of finishing it off.

Monday, January 20, 2014

Garden Room 1.0

Here are the before shots of the covered patio we are turning into a garden room...

This was taken right after we moved in, and long before we painted the exterior.
And here is what it is looking like right now...
 More junk in here at the moment, and we plan to paint everything white to reflect the light

but this is what the outside wall looks like sans paint...


And here is our new seed starting station...

The lights raise and lower (hung on chains and looped over an S hook on the shelves above) so as the seedlings mature, we can move the lights higher! Each shelf (the three that we put lights on) has a total of four fluorescent daylight bulbs.  The outlet they are plugged into is NEW! :)

I think we are planning to move that further away from the door that goes into the dining room, (left edge of the picture) and put a small shelf in the corner to store things like testing equipment, etc.  At the moment nothing is finalized for the plans, but they are firming up each little advance we make.  We found an aquaponics forum to join, and have gotten some good information from the short spurts of time we have spent there.

So, that is the promised update!

Sunday, January 19, 2014

This Week's Art

My dream of regular posts here on my blog has not really come to fruition as I had hoped, but here I am with a little art update.  Hopefully by the end of today I will have another post ready with a little garden room update, because I am sure you are waiting with baited breath to see our progress! :)

This first piece is 6X9 inches.  It started out as the back cover for the last art journal I made, but was too thick to go into the machine that punches the holes for a spiral bound book.  So, since it was already taped and paper covered, I decided to make it into something else.  I had signed up for a "letter writing project" that turned out to be anything BUT letters, and my partner in that was the recipient of this bit of collaged mixed media.  She said it was, "the most beautiful thing anyone had ever given her."  Made me happy that she liked it! :)

These six Artist Trading Cards (ATCs) are for a "jam" or "round robin" where three artists collaborate, then each one ends up with two completed cards in the end.  The first is a young man in Michigan with whom I have been swapping ATCs for a couple of months.  Great guy!  I put on the second layer, then sent them on to a pen-friend I met on Instagram with whom I am doing all sorts of swaps including both art journals I have sent off!

This is one of two ATCs (both shown below) I made for a swap-bot swap with a Valentine's Day theme.

The Facebook group I am part of (Mixed Media ATC Artists) does two swaps per month.  This one is Red or Pink with a heart.  We make three cards to swap, this and the next two are my offerings for this swap.


One of my Instagram friends is a teacher in Neosho, MO, and is doing a handmade postcard swap with several of her students 5th-8th grade.  She asked for volunteers who would be willing to swap with the kids, so I did this one. I recycled the cover of a calendar I received from my daughter who faithfully brings me all sorts of crap wonderful crafting materials. :)

This picture is my first art journal page in one of the traveling journals I am participating in.  The owner of the journal likes purple and blue, butterflies and outdoors.  It was a tremendous learning experience for me, and while it was not what I would have made had I known at the beginning what I learned in the process, I think she will be happy with it.

And, lastly, more giftings from Elizabeth (Victoria Secret packaging) turned into post cards.  I covered them with vintage maps, used washi tape, modeling paste, some new stencils, embossing powder, Dylusions inks, Stickles Glitter, some stamped tissue paper I got in a swap, embroidery floss and found letters. One is a thank you card for a RAK I received in November, and the other is for a mail art swap.

I took these postcards to the Post Office to make sure I had sufficient postage on them, and Ornery brought the boxed mail up to the counter while I was there.  Apparently there had been wild speculation among the postal employees as to who the recipient of all the wildly decorated mail was.  :)  I think they were disappointed that I was just an ordinary patron, not some Casanova with lots of girlfriends from all over the world.  :D  However, they seemed to be enjoying all the colorful mail I get.  Sadly, they don't get to see much of the wild stuff I send out!

Sunday, January 12, 2014

A Little Bit of Art

It seems like since my sister left, I have been just playing catch-up on the house work, laundry, sleep... It was a delightful visit, and I am so glad they came.  Ornery has been slow about getting back out there to work as well.  I think we were both pretty worn out!

I did do a little bit of art this week, a post card swap with some Instagram friends,


and work on one of my traveling journals.  The front cover is made from the gelli prints I made while Mimi was here.  I cut them to make this design...


Then I took it to Office Depot and they spiral bound it for me and I brought it back home and added all these ribbons to the spiral...

It took me several hours to cut, tie and clean up the mess from that project, but the journal should be in the mail on Monday headed to its first stop.  This journal is for just three of us, all Washi-tape aficionados!

I have been working on my studio since 3:00 this morning, doing laundry (I didn't know we even owned that many clothes!!) and cleaning up the kitchen.  It is starting to look a little less like a hurricane blew through here, and more like the tidy place we are (mostly) used to! Ornery has been fussing with his GFCI outlet in the new room, and finally discovered the problem in the wall switch that turns on the lights.

We both have rather long lists of things to do but we have crossed off quite a few things already this weekend, so that feels good.

  • It's time to start working on the taxes, a chore I always dread but feel extremely smug about once I am finished
  • I just got my first order of doTERRA essential oils and have a heap of educating myself to do with those. 
  • I am involved in two traveling journal projects, several ATC "jams" or round-robin sets which travel from one person to another and get stuff added at each stop, and I am signed up for a few swaps on Swap-Bot.  
  • We are still gathering the needed supplies for our aquaponics garden--the most pressing is the grow media.  I just placed an order for some Grow Stones--everything for the project seems to be quite costly, but hopefully it will be worth it once the fresh veggies start producing.
  • I need to organize some menu plans and do a bit of freezer cooking.  Everything is just about empty, and I prefer to have a few things that are quick and easy to prepare on hand for days I just don't feel like cooking (or would much rather keep playing instead of spending time in the kitchen!)
  • We still have a bit of housework to catch up on...construction is always messy, and much detritus was dragged in onto the carpet. I really hate to vacuum...
So, that is our upcoming week.  

Thursday, January 9, 2014

Home Alone

After company for Ornery's birthday and a full week of overnight company, Ornery and Elizabeth (who had the flu earlier in the week) are finally back at work, my sister and brother-in-law are on the road headed back to Tucson, and the house is empty for a few hours, except for little ol' me!

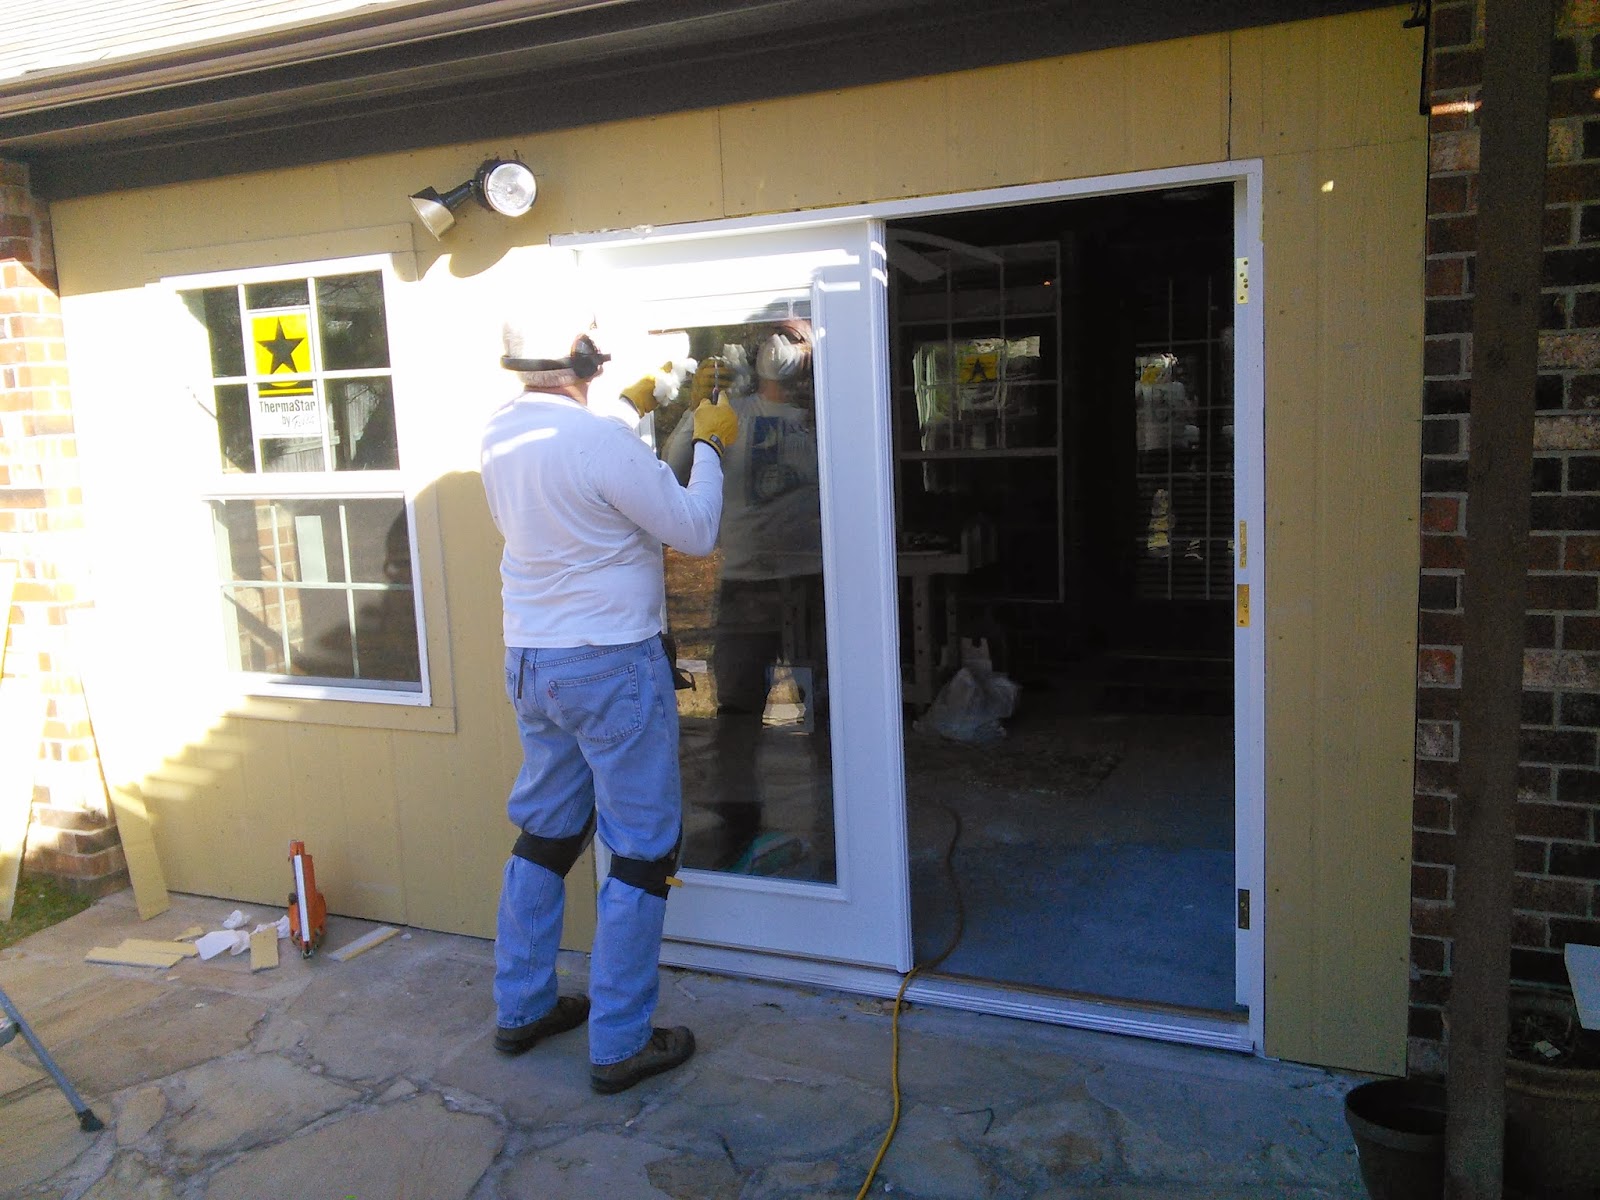
The construction project, while fraught with challenges and accidents, is mostly complete.  We have a wall, French door with knob and lock, window, power, (which was quite a feat requiring a new breaker box, ceiling outlets, wall outlets and a new exterior porch light, exhaust fan motors...) HVAC connected to the main house with return air vent, exhaust fans and insulation overhead and in the wall.  The green-board sheet rock is up on the inside wall and other than a bit of sanding, ready to paint. The exterior hardi plank siding is up and also ready to receive paint.

There were weather related issues to deal with throughout, since the entire country experienced record breaking cold temperatures.  Fortunately, we had a propane heater, and borrowed Ornery's mom's double burner model, so the guys were able to pour the floor leveling material (required to install the door on a level surface) and dry the joint compound on the sheet rock so it could be sanded.

CW spent about 10 hours in the attic on that coldest day since 1912, and was so cold when he finally came down his feet were too numb to balance on the beams and he almost fell through our bathroom ceiling.  The only actual casualty was the staple gun he had in his hand which he flung in his effort to grab hold of something to break his fall, and because of the deep insulation, he was unable to locate it.  The project was rather hard on staple guns.  I think they ended up breaking/buying 3 or 4 by the time it was all done!

The blown insulation was a three person job requiring two in the attic yelling instructions to the third person in the garage tending the machine.  In the end I think they broke that as well as part of Ornery's shop vac.  Other than those casualties, however, I haven't heard of any other disasters.

Ornery is delighted to be so far along on the project, although he has a whole lot more work to do before we are close to ready to start planting any seeds, but overall it was worth the wait for CW and Mimi to be able to come.

Mimi did a lot of the cooking while they were here.  She is more of a foodie than I am, and frankly, I tend to just throw something together at the last minute and hope for the best.  Not her!  We ate high on the hog for a whole week, and that without gluten, sugar or (for me) any dairy or nightshade foods!  Other than the cooking, however, I had her steadfastly occupied in my studio making her first Artist Trading Cards, some greeting cards, and on the last day, prints on my new Gelli-plate printing plate.  Of course I was occupied in similar pursuits, and have a few photos to show for my week's worth of absence from the blogosphere...

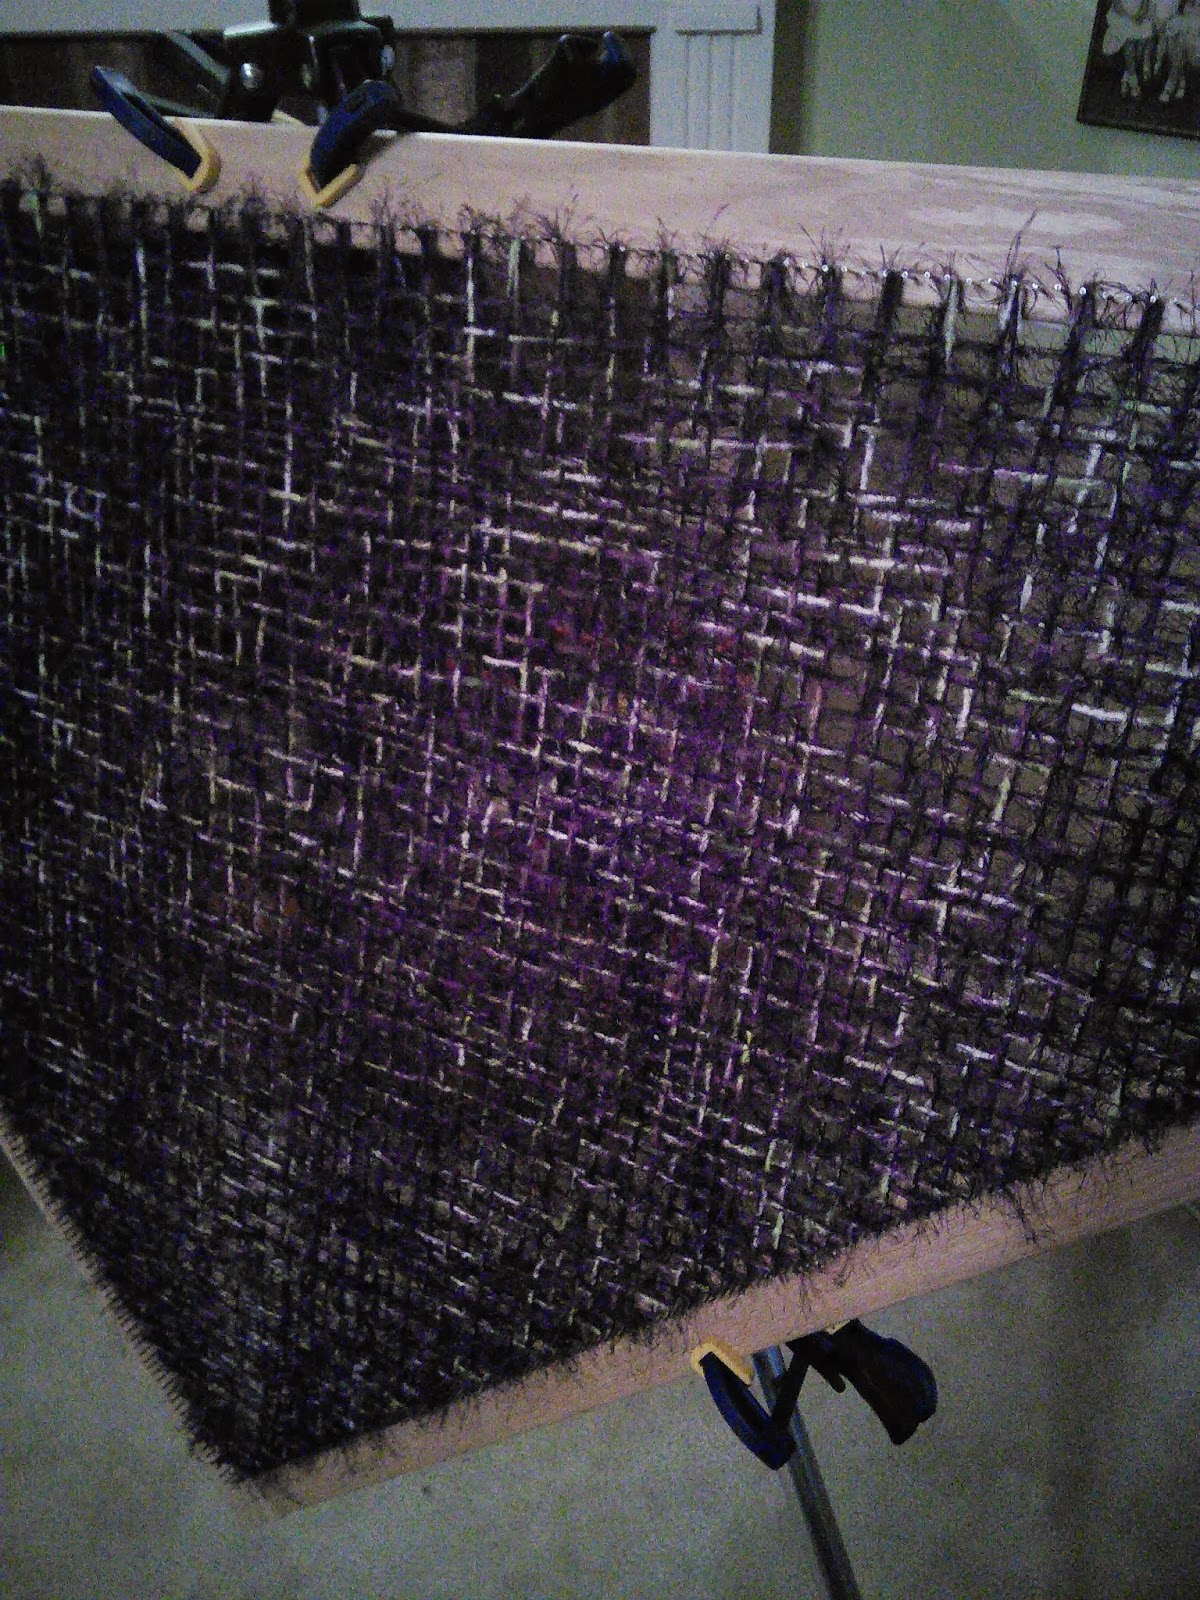
Elizabeth finished the green shawl she had on the loom before Christmas, and came over one afternoon and started this new one for Michael's sister.

Add caption
 The first day in the studio with Mimi, we got out the Twinkling H2O watercolors and painted assorted random papers.  Then we played with them.  This ATC was made using some emboss resist (chicken wire stamp) and the Twinks.  I was all set to swap it until Mimi said she wanted one just like it, so I gave it to her. :)

 This is a post card for a SwapBot swap called Gift-wrap Mail Art.  I used tissue paper for the background, added washi tape and flowers, sealed it all with gloss gel medium, and then added the flowers, brads and eyelash yarn on the right side.  I was going to send it "naked" but in the end put it inside a clear plastic sleeve for mailing.  No point in clogging up the mail machines, right?

 After we finished with the Twinks, I showed Mimi how to use Alcohol Inks.  This background paper was just a slick white paper I added various ink drops to.  I applied the felt applicator to parts of it, and used a coffee stir stick to "blow" to make the runs.  I stamped a jar image on some silver vellum, added the gold cap with liquid pearl, and stuck on the little asparagus spears I had in my stash.

 Then I decided to just get busy and make a few ATCs for trading.  This one is using some new papers I got for Christmas in a 6X6" paper pad.  Nothing extraordinary, but certainly fun!

 I ended up sending it to one of my pen-friends inside this card.  I found the stamp of the little chick in the clearance bin at Hobby Lobby on the day Mimi and I were sent on some errands for the guys.  We took a rather long side-trip to HobLob and spent my Christmas gift card (plus a bit more) and Mimi bought some yarn for Elizabeth to make a shawl for her, along with a few fun paper crafting items.

 Another card I made using the paper pad...

 Then we got out the modeling paste and silks acrylic glaze.  This was my first attempt at using a rubber stamp on the surface of the paste.  I didn't care for the result of that part, but by the time I added inks and silks to the ATC, I was pretty pleased with the final product.  It traded right away, so someone else liked it, too! :)

 After my success with the modeling paste on the first one, I decided to just get several cards out and play with it some more!  This one (and the ones following) were painted white with acrylic paint, then spritzed with Dylusions spray ink.  Then I applied modeling paste through various stencils, some of which I mixed with the over-sprayed ink on the mat, then highlighted with silks acrylic glazes.  And a bit of Stickles, glitter glue.  The little butterflies are punched out of scraps...

 This one uses just little spots of the modeling paste, a little tab I cut from some QuicKutz dies, a torn bit from one of the papers we painted with Twinks, some washi tape, and a wire tree. I used silks around the edge of the card to add a bit more dimension and sort of frame it.

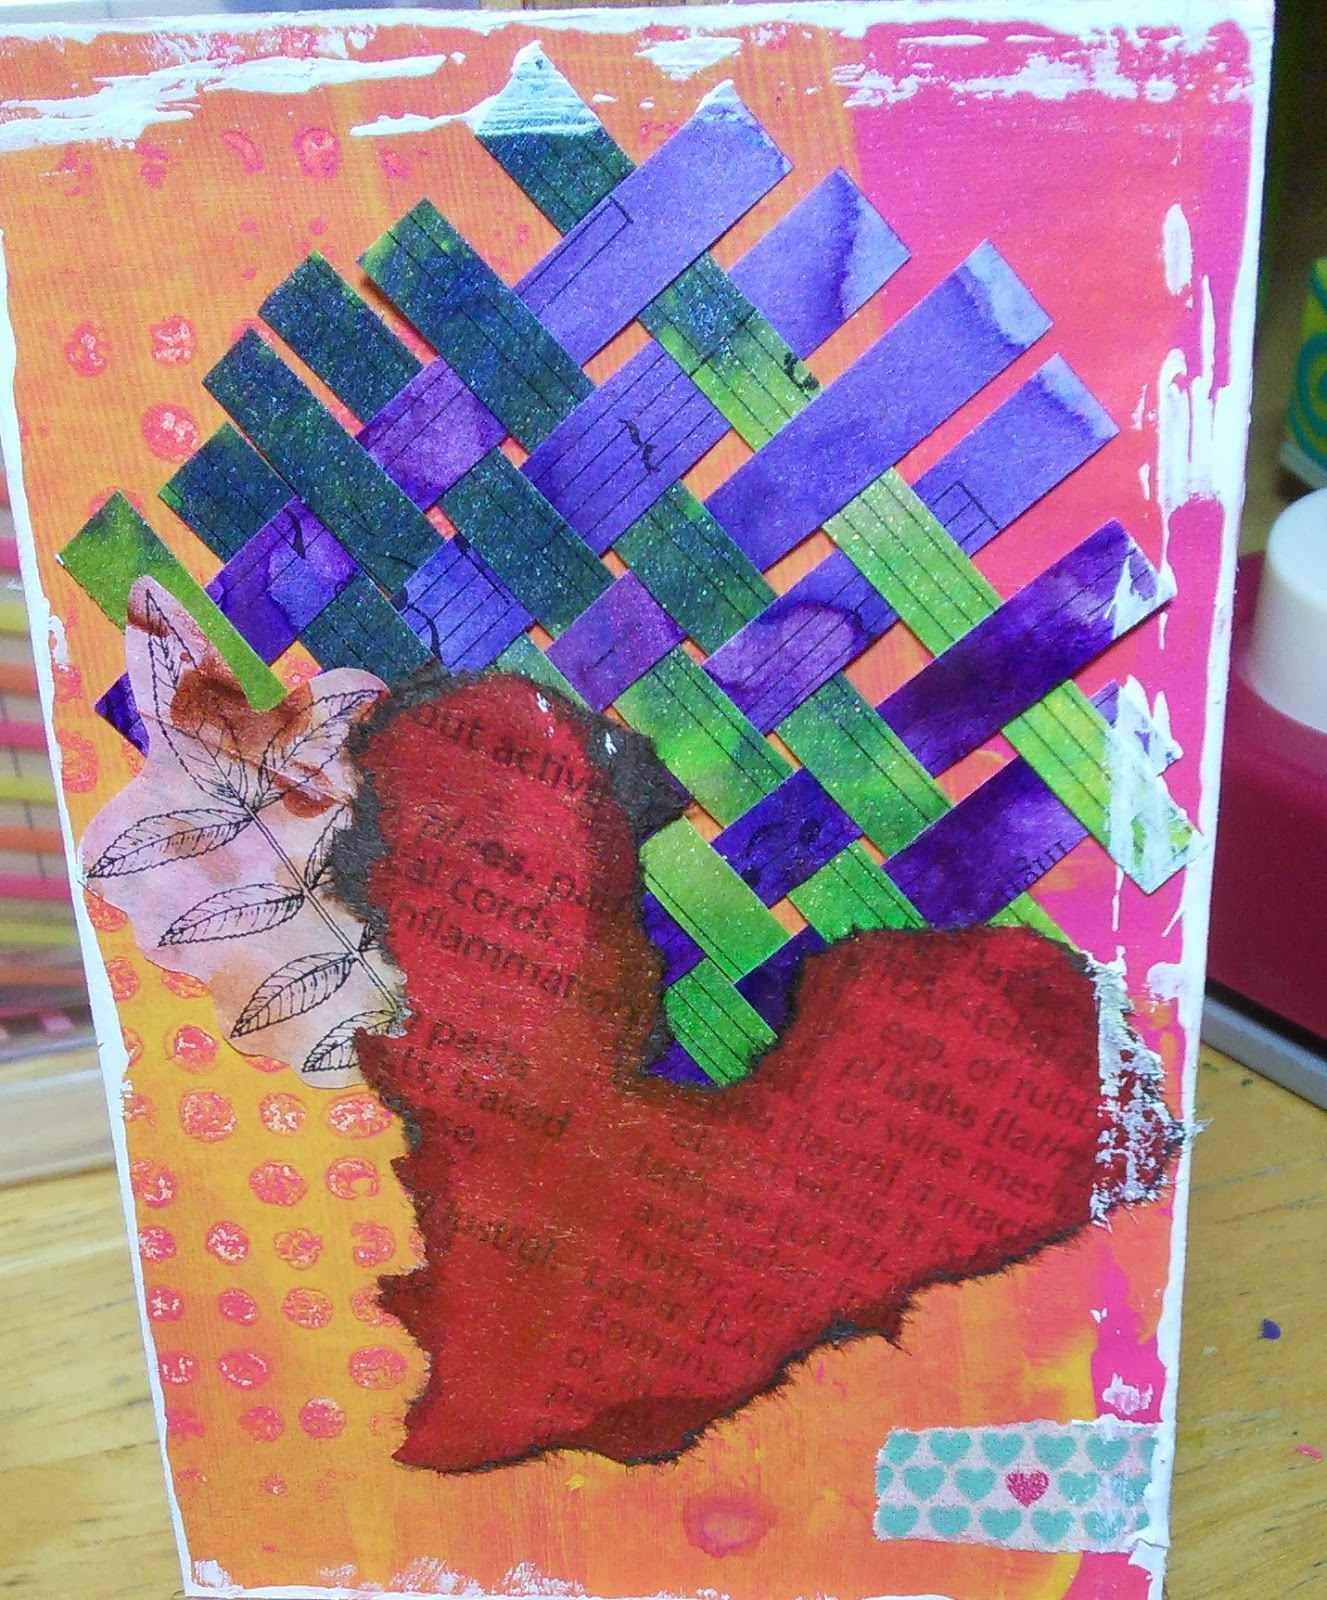
 This one was probably my favorite.  The white acrylic paint on the surface of the card mixed with some inks left the base pretty shiny.  The modeling paste has no shine whatsoever, so you can really distinguish the outline of the stencil I used as an imprint.  I added drizzles of silks over it and around the edge, then I used a heat gun on it to make the paint bubble up.  When it cools, the uneven surface gives an interesting texture.

The hearts are cut from scraps of old Russian sheet music I had in my scrap box, and I edged them with gold stickles.
 For this ATC, I squeezed some modeling paste onto the surface of the card and used a notched tool to drag through it and give it some shape.  Once it was dry (and very WHITE) I decided to add some Key Lime Silks acrylic glaze.  I applied it with a stick, so it is pretty thick on the surface of the modeling paste, but it is almost eye-popping bright under the lights.  I love the shimmer of those glazes!!

 For this ATC I used a clock stencil with some colored modeling paste (mixed in some ink from the overspray) then sealed it with gloss gel medium.  The other accents are washi tape, Tim Holtz metal embellishment and Eyelet Outlet doggie brad.  It is my last dog brad, and I think I may need some more of those!! :)

Yesterday, which ended up being a bonus day since they were able to stay longer than originally planned, Mimi and I got out my new Gelli printing plate.  We started out using my acrylic craft paints but quickly discovered that we liked the look we got from the Silks much more, so we ended up going back and applying silks to all the first prints we made.  After they were all dry, I cut them in half so we each got to keep 1/2 our work. It was time consuming and very messy, but we both had a great time with it and I am sure I will get it out often to make background papers for future projects.

So, that was my week!  I will post photos of the before and after garden room once we get a little further along.  I would like to get some of the mess cleaned up before I put photos out there for general consumption! :)