I am participating in two separate art journal round robins, one with three people and one with eight. The swap with 8 people has 7 US residents and one in Scotland, so the originator of the swap is sending around her journal and the out-of-country journal together. Both arrived at my house this week, and I have been hard at it creating something I would like for others to see. I also am in possession of my own journal for the other swap, and haven't started working in it yet--that's next!
Here are photos of the pages I did in the two albums.
Both albums had a variety of types of pages inside, and since most people seemed to prefer the single-no-flap variety, I opted for one with a flap. Turns out I was a glutton for punishment! Anyway, the first photo, above, is the outside flap of the page. I inked the page then tore strips of sheet music painted with twinkling H2O watercolors and loosely wove it. There is washi tape, a bit of acrylic paint smudged and strategically placed here and there, and it may not really LOOK like a million letters, but when you are punching them out, it sure seemed like it!! I used my QuicKutz dies to do the letters, then grunged them up with ink and stamps. (click on the image if you want to see it bigger.)
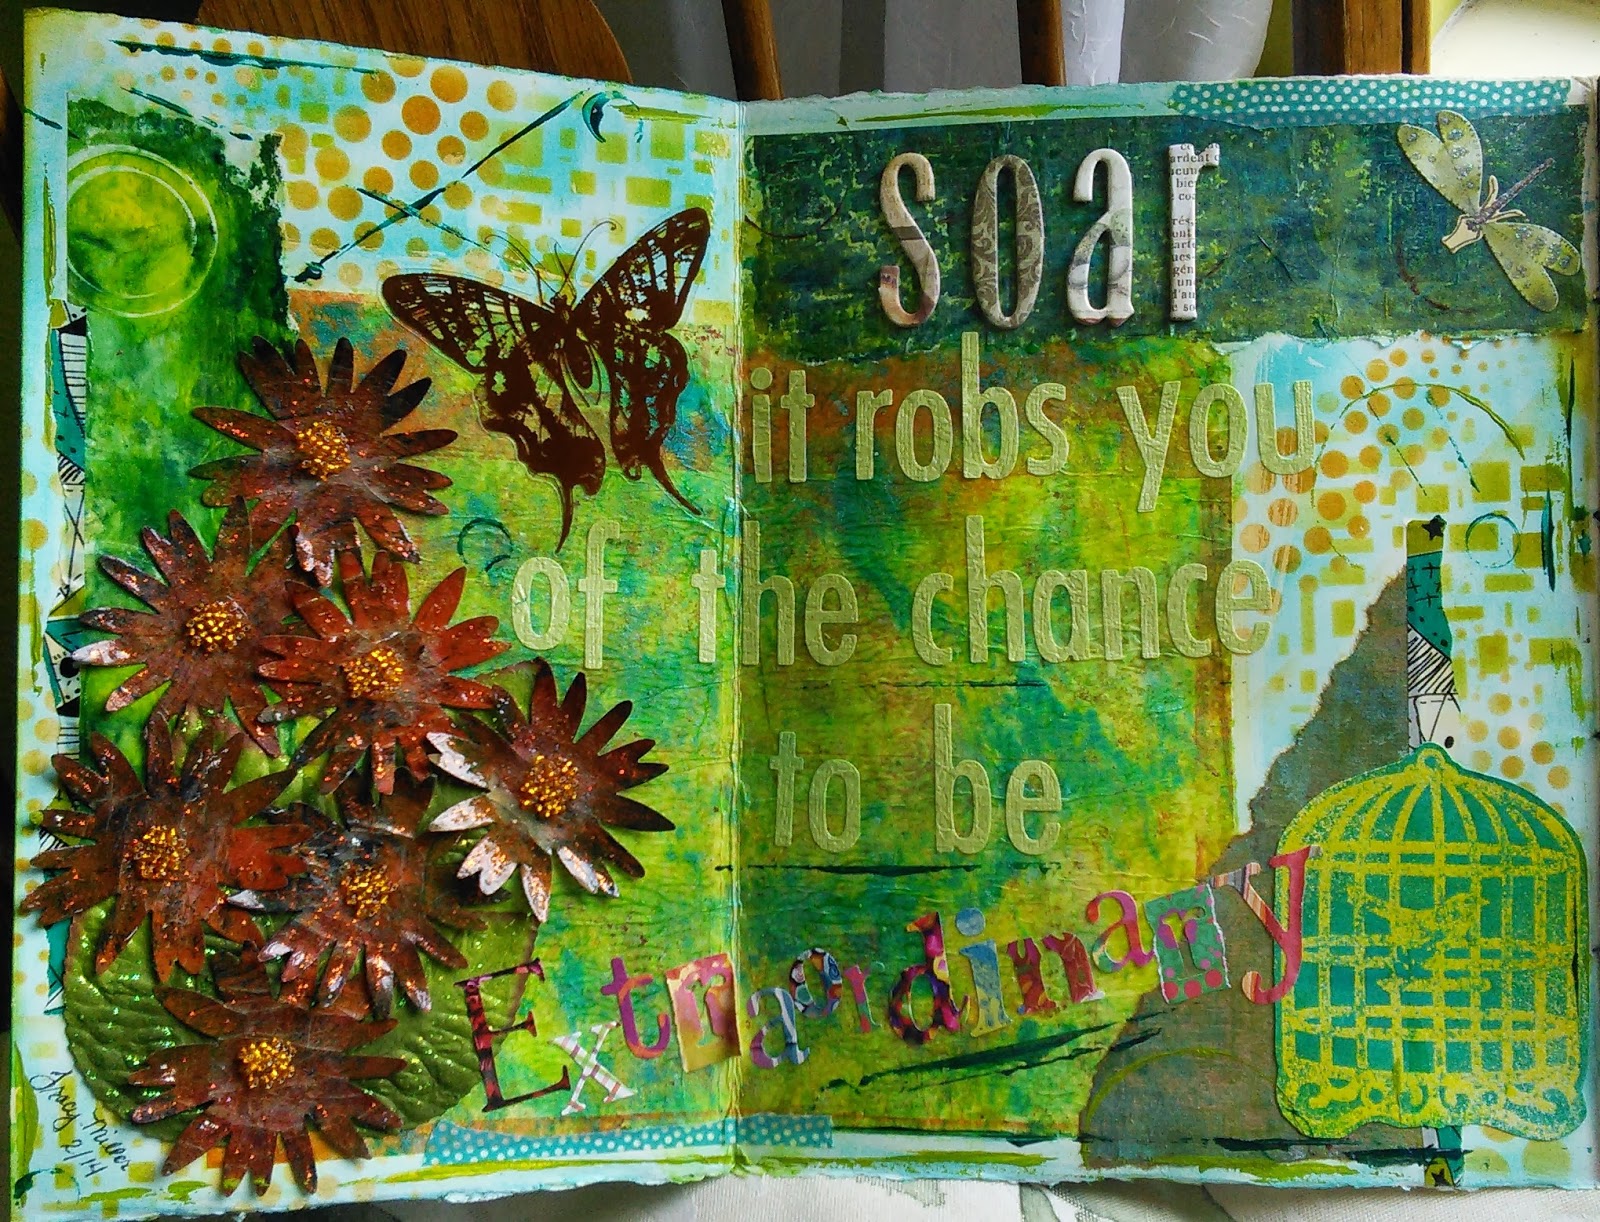
This is the inside of the spread. After I inked all over the page, I used strips of paper I had painted on with my Gelli-plate and added them here and there. Then I used orange and green distress ink with stencils to make the patterns. The bird cage clip art is actually stamped using a wooden stencil a friend gave me. I embossed it with clear embossing ink, then sprayed the whole thing with the blue ink. The embossed areas resisted the ink, leaving a lovely image.
The flowers are also punched from gelli-plate prints, using a zinnia punch. After I punched them, I dredged them in embossing ink, then ultra thick embossing enamel (UTEE). By reheating the UTEE I was able to add a couple more layers of the powder, and then melt it again. It gives a hard plastic looking finish. For the centers, I dropped some Glossy Accents (Ranger) in the center, then scooped some glass seed beads onto the glue. Once it was all dry, I accented it with some paprika colored stickles glitter glue. I don't know how well it will stay, but I was afraid to melt the UTEE anymore, especially since it was already in the book.
The owner of this second journal prefers bright colors (Yay!) but no sparkly glitter (Boo!). But, I am not deterred! I started on the flap with a piece of deli wrap I had painted with silks acrylic glaze on my gelli-plate. Then I added the pattern piece, just to give it some color and added interest. The circles were torn from a piece of fun tissue paper I got in the mail a while ago. I used the same circles on the far right side of the inner spread, which you can see in the next photo.
The hearts are made with glass bead gel, which is shiny without being sparkly! :) I outlined them with black so they would show up better, since the gel is clear. I think in the future, I will ink or paint the areas using the stencil so they will show better.
This is the full effect of the first page.
And this is the whole inside layout. The flowers on the left were all punched from yellow card stock. I punched the center out of them and used UTEE on them so they would be shiny, then I painted the petal part with silks acrylic glaze. After it was dry, I drew in the black designs. This person really likes patterns, so I tried to incorporate a lot of them on the design. In the center of the page, I used more glass bead gel with a triangle stencil, then I reset the stencil and drew more triangles from the stencil that I had not used before with the gel. There is washi tape, ribbon, and various types of paper, plus the little heart on the book pocket is made of polymer clay. (I didn't make it.)
Here is a close-up of the pocket. Her name begins with a T, so I used that on the front. The chipboard letter was originally plain, I added the orange gelli-print onto the top and embellished it with yarn and the heart paperclip.
The tag is made of security envelope linings. I have been saving them for just such a purpose! The various other words and designs are all rub-on embellishments I have had for a while.
That was two full days of art, but I feel really good about my offering in their journals. It leaves in the morning for the next stop!


2 comments:
You did a beautiful job! But...no glitter?!?!?!
she'll love this!
Post a Comment