April is here!! It's time for daily blogging, lots of visitors and meeting new friends. In other words, time for the Blogging A to Z challenge hosted by Arlee Bird and his team of minions. Thousands of other bloggers from all over the world participate in this blog hop each year, and anyone may join in as long as they blog each day during the month of April, (except Sundays) the blog posts correspond to the appropriate letter for that day, and they sign up on the link list. Simple!
As mentioned in my E post, one of the elements of art is texture. I love texture!! I add it in a variety of ways: layers of paper or tape; textured papers such as hand-made or other textured scrapbook papers; mediums like super heavy gesso, modeling paste or glass bead gel; glue, glossy accents or texture spray such as "Goosebumps"; a variety of non-art related products such as drywall tape which comes in a variety of styles, corrugated paper, mesh bags, etc.; fabric such as burlap or other loose weave; fibers such as yarn, string, hemp, thread... You can imagine that just about anything can be used!
One of the first things that captured my interest in mixed media art was Trading Cards, commonly known as ATC's (Artist Trading Cards). These are 2.5 x 3.5" little miniature works of art. They can be made with any style or form, the only hard and fast rule is the size. I have a nice collection that I keep in two large binders filled with sleeves like those used for sports card collections.
Twinkling H2O watercolors, (twinks) are little pots of watercolor infused with minerals to create a shimmer effect. They were my first real art supply after I left the world of scrapbooking. They come in so many colors, and every single one makes me happy! :)
Thank you for coming by today! I hope you learned something or were inspired. I'd love to hear what you have to say in the comments!
Showing posts with label TwinklingH2O. Show all posts
Showing posts with label TwinklingH2O. Show all posts
Thursday, April 23, 2015
Wednesday, April 22, 2015
Blogging A to Z: Stencils, Stamps and Shimmer
April is here!! It's time for daily blogging, lots of visitors and meeting new friends. In other words, time for the Blogging A to Z challenge hosted by Arlee Bird and his team of minions. Thousands of other bloggers from all over the world participate in this blog hop each year, and anyone may join in as long as they blog each day during the month of April, (except Sundays) the blog posts correspond to the appropriate letter for that day, and they sign up on the link list. Simple!
A few favorite things I use in my art show up in today's line-up: Stencils, Stamps and Shimmer.
I have talked about stencils here a bit, because I use them for modeling paste and glass bead gel a lot. I also use them with spray inks, and have quite a large collection of these little plastic jewels.
Stamps are another popular tool with mixed media artists, and while I used to think a stamped image must be perfect, squared, and colored exactly, I have certainly changed my tune! I no longer look for elaborate design stamps, but instead prefer stamps that either say something or give impressions rather than exact images. Here is an example of some I have been lusting for...Actually the site I had hoped to feature apparently sold out of the sets I had been eyeing, but they will probably come back again later.
I do have a smallish (comparatively speaking) collection of stamps. My favorite are the clear stamps, but the images are (supposedly) better with red rubber stamps. Those can be purchased mounted or unmounted. I am a big fan of unmounted stamps because they take up less space.
My last S word for today is shimmer. Oooh. I love shimmery goodness! In fact I have a rather large array of products that provide shimmer and sparkle in my art.
Thank you for stopping by today! I hope you enjoyed your visit!
Wednesday, July 16, 2014
Traveling Letter Journal
I have two pen-friends who are both interested in art and pen-pal letters. We all connected via swap-bot, although I had met Karen on Instagram. Over the last several months, we have done a variety of collaborations, and recently embarked on a new one. Beth bought a small journal and we are each going to write in it, preferably with doodles and whimsical writing as well. Here were my first couple of pages.
This first one is doodles and paint. I used glaze gel pens by Sakura for the doodles, and Twinkling H2O watercolors for the fill-in.

 And this is the finished spread. I did one more page, but it is all writing, so I didn't post it. The journal will travel around to each of us, and we will get to read what the others wrote, then add a message to both of them. We still write regular letters as well, but this is a fun little adventure, especially with all the fancy lettering and doodles.
This first one is doodles and paint. I used glaze gel pens by Sakura for the doodles, and Twinkling H2O watercolors for the fill-in.
Sunday, June 22, 2014
Journal Pages and Cover
My pen friend Karen received her ojswap journal almost six months after it was started, and was sad to find several blank pages within. So she asked if I would do another spread to help her fill it up. She hadn't decorated her cover either, so I offered to do the front. Here are pictures.

I covered the front with gesso to give it a clean surface, then adhered printed tissue paper and a few torn squares of lime green tissue with matte gel medium. I cut the letters free hand from a variety of papers except for the Tim Holtz playing card A.

Here is the spread. Below are closer shots of each page. The background is twinkling H2O watercolors dribbled on, then manipulated with bubble wrap and a baby wipe. The banner flags are gelli-prints, all but one are made by me, the r is on one made by my friend Jonathan. The spread took me a full (long) day to create.


I wove some strips of paper (mostly gelli-prints) behind the f. The bicycle is stamped and embossed in white. The flowers between the r and i banners are torn bits of washi tape. The letters are stamped with making memories foam stamps using distress paint by Ranger.
I always try to use some washi tape on my artwork, and on these pages, in addition to the torn strips along the top left and bottom right pages, I cut pieces to hang the flags on the green eyelash yarn, a leftover from my daughter's last shawl. The feather on the d flag is cut from the front of a pen pal letter-- a bit of recycling... The little flower pot is actually metal, and the leaves and flowers came from other pen pals.
I have one more single page to do before I send it on to another pen pal to work in. I got some new alcohol inks yesterday and plan to do something with them. Happy Sunday!
Saturday, March 29, 2014
Rethinking A to Z
I have decided to forego participation in the A to Z blogging challenge this year. Computer problems and other time commitments plus a lack of motivation have aided my decision making process.
I have done a bit of art and letter writing lately, but not much computer time.
I also did pages in two art journals that I haven't posted yet.
Today I sent out 15 pieces of mail--cards, letters and swaps. Tuesday is the first day of National Letter Writing Month, so I anticipate a busy time ahead!

I have done a bit of art and letter writing lately, but not much computer time.
 |
| Washi tape house |
 |
| Artist Trading Card made with twinkling h2o watercolor, acrylic, modeling paste, ink and washi tape. |
 |
| This is a tip-out page. The gutter is on the left and the washi tape acts as a hinge. I used alcohol inks and embossing on it. |
 |
| This is the page opened out. I used a gelli-print for the background, sheet music along top and bottom, and acrylic paint with a stencil for the butterfly. The smaller markings on the wings are made with glass bead gel I tinted with primary elements artist pigment. |
 |
| Gelli-print background and flowers. The letters were stamped with foam stamps and embossed with translucent gold embossing powder. |
 |
| This was the second page I did in this journal, mostly just animal pictures from various sources on an inked background. |
Today I sent out 15 pieces of mail--cards, letters and swaps. Tuesday is the first day of National Letter Writing Month, so I anticipate a busy time ahead!
Sunday, March 2, 2014
Mixed Media Art
The request was for some flowers in lots of colors. Here is my response. It is going to a pen friend in the Philippines.
 This piece is 8X10, and for the flowers I used a page from the journal I bought when I first got my twinkling h2O watercolors. I had traced around some chipboard shapes and tried to paint flowers using all the colors I had at the time. They were just scattered around on the page, so when I was asked to make this, I cut out all those flowers and dressed them up a bit with some glitter. Then I cut leaves from a page I painted with greens for that purpose, and a vase from a bit of black paper I had experimented on to see what twinks would do on a black background.
I still had some flowers left, and a piece of this cool background paper, also painted with twinks this past week, so I made a 5X7 sized card for a friend.
 Still on that flower kick...
I still had some flowers left, and a piece of this cool background paper, also painted with twinks this past week, so I made a 5X7 sized card for a friend.
Monday, February 10, 2014
Altered Files, Birthday Presents, and Happy Mail
Happy Monday! Ornery and I had a productive weekend! Here are a few pictures of the fruits of my labor. (another post will feature HIS projects!)
Friday my birthday gift from Ornery arrived in the form of new colors of silks, twinks and primary elements artist pigment powders. Oh, glorious day!! :) My birthday isn't until next week, but we celebrate from the beginning of the month... :)

Also in the mail was my order from Stampin' Up. They offered in their clearance section some 8X8 albums for $5.99. They are 3 D-ring binders and came with 10 sheet protector/pages inside. I had been planning to make a stencil binder for storing my 6X6 stencils in, but I am sure I couldn't make one for $5.99, so I ordered two. I only needed one binder for stencils, but both sets of pages. I am going to use the other for a Mail Art Junk Journal.
 Outside cover...^^ and below is what it looks like with some stencils parked inside. :)

Saturday I worked on my own art journal for a round robin swap with two pen friends. Here is one of the pages--I apparently forgot to photograph the other one!
 It was an accidental theme, as when I was spritzing the page with spray ink, over-spray got onto all the little paper dresses I had set aside for the page. Oh, well. It's the truth!
Sunday I broke out the Gelli-plate for another session. I created 35 beautiful monoprints! :)

Next, I put together some altered file folders and a couple of post cards. One folder is for a swap, the other is for my new Mail Art Junk Journal. Here is a pile of completed projects from Sunday.

And here is a photo of the outgoing mail for Monday. I put together some surprise Valentine's presents for a couple of my nephew's kids and my two grands. The other items are my journal and a couple of swaps, plus the post card going to an Instagram friend.

Here is my folder front and back.


and here is the folder I made for the swap, front and back. Note the stitching. It happened here. Really.

 That's all folks!
Friday my birthday gift from Ornery arrived in the form of new colors of silks, twinks and primary elements artist pigment powders. Oh, glorious day!! :) My birthday isn't until next week, but we celebrate from the beginning of the month... :)
Also in the mail was my order from Stampin' Up. They offered in their clearance section some 8X8 albums for $5.99. They are 3 D-ring binders and came with 10 sheet protector/pages inside. I had been planning to make a stencil binder for storing my 6X6 stencils in, but I am sure I couldn't make one for $5.99, so I ordered two. I only needed one binder for stencils, but both sets of pages. I am going to use the other for a Mail Art Junk Journal.
Saturday I worked on my own art journal for a round robin swap with two pen friends. Here is one of the pages--I apparently forgot to photograph the other one!
Sunday I broke out the Gelli-plate for another session. I created 35 beautiful monoprints! :)
Next, I put together some altered file folders and a couple of post cards. One folder is for a swap, the other is for my new Mail Art Junk Journal. Here is a pile of completed projects from Sunday.
And here is a photo of the outgoing mail for Monday. I put together some surprise Valentine's presents for a couple of my nephew's kids and my two grands. The other items are my journal and a couple of swaps, plus the post card going to an Instagram friend.
Here is my folder front and back.
and here is the folder I made for the swap, front and back. Note the stitching. It happened here. Really.
Friday, February 7, 2014
Two Art Journals
I am participating in two separate art journal round robins, one with three people and one with eight. The swap with 8 people has 7 US residents and one in Scotland, so the originator of the swap is sending around her journal and the out-of-country journal together. Both arrived at my house this week, and I have been hard at it creating something I would like for others to see. I also am in possession of my own journal for the other swap, and haven't started working in it yet--that's next!
Here are photos of the pages I did in the two albums.
 Both albums had a variety of types of pages inside, and since most people seemed to prefer the single-no-flap variety, I opted for one with a flap. Turns out I was a glutton for punishment! Anyway, the first photo, above, is the outside flap of the page. I inked the page then tore strips of sheet music painted with twinkling H2O watercolors and loosely wove it. There is washi tape, a bit of acrylic paint smudged and strategically placed here and there, and it may not really LOOK like a million letters, but when you are punching them out, it sure seemed like it!! I used my QuicKutz dies to do the letters, then grunged them up with ink and stamps. (click on the image if you want to see it bigger.)
 This is the inside of the spread. After I inked all over the page, I used strips of paper I had painted on with my Gelli-plate and added them here and there. Then I used orange and green distress ink with stencils to make the patterns. The bird cage clip art is actually stamped using a wooden stencil a friend gave me. I embossed it with clear embossing ink, then sprayed the whole thing with the blue ink. The embossed areas resisted the ink, leaving a lovely image.
The flowers are also punched from gelli-plate prints, using a zinnia punch. After I punched them, I dredged them in embossing ink, then ultra thick embossing enamel (UTEE). By reheating the UTEE I was able to add a couple more layers of the powder, and then melt it again. It gives a hard plastic looking finish. For the centers, I dropped some Glossy Accents (Ranger) in the center, then scooped some glass seed beads onto the glue. Once it was all dry, I accented it with some paprika colored stickles glitter glue. I don't know how well it will stay, but I was afraid to melt the UTEE anymore, especially since it was already in the book.
The owner of this second journal prefers bright colors (Yay!) but no sparkly glitter (Boo!). But, I am not deterred! I started on the flap with a piece of deli wrap I had painted with silks acrylic glaze on my gelli-plate. Then I added the pattern piece, just to give it some color and added interest. The circles were torn from a piece of fun tissue paper I got in the mail a while ago. I used the same circles on the far right side of the inner spread, which you can see in the next photo.
 The hearts are made with glass bead gel, which is shiny without being sparkly! :) I outlined them with black so they would show up better, since the gel is clear. I think in the future, I will ink or paint the areas using the stencil so they will show better.
 This is the full effect of the first page.
 And this is the whole inside layout. The flowers on the left were all punched from yellow card stock. I punched the center out of them and used UTEE on them so they would be shiny, then I painted the petal part with silks acrylic glaze. After it was dry, I drew in the black designs. This person really likes patterns, so I tried to incorporate a lot of them on the design. In the center of the page, I used more glass bead gel with a triangle stencil, then I reset the stencil and drew more triangles from the stencil that I had not used before with the gel. There is washi tape, ribbon, and various types of paper, plus the little heart on the book pocket is made of polymer clay. (I didn't make it.)
 Here is a close-up of the pocket. Her name begins with a T, so I used that on the front. The chipboard letter was originally plain, I added the orange gelli-print onto the top and embellished it with yarn and the heart paperclip.
 The tag is made of security envelope linings. I have been saving them for just such a purpose! The various other words and designs are all rub-on embellishments I have had for a while.
That was two full days of art, but I feel really good about my offering in their journals. It leaves in the morning for the next stop!
Here are photos of the pages I did in the two albums.
The flowers are also punched from gelli-plate prints, using a zinnia punch. After I punched them, I dredged them in embossing ink, then ultra thick embossing enamel (UTEE). By reheating the UTEE I was able to add a couple more layers of the powder, and then melt it again. It gives a hard plastic looking finish. For the centers, I dropped some Glossy Accents (Ranger) in the center, then scooped some glass seed beads onto the glue. Once it was all dry, I accented it with some paprika colored stickles glitter glue. I don't know how well it will stay, but I was afraid to melt the UTEE anymore, especially since it was already in the book.
The owner of this second journal prefers bright colors (Yay!) but no sparkly glitter (Boo!). But, I am not deterred! I started on the flap with a piece of deli wrap I had painted with silks acrylic glaze on my gelli-plate. Then I added the pattern piece, just to give it some color and added interest. The circles were torn from a piece of fun tissue paper I got in the mail a while ago. I used the same circles on the far right side of the inner spread, which you can see in the next photo.
That was two full days of art, but I feel really good about my offering in their journals. It leaves in the morning for the next stop!
Tuesday, January 28, 2014
A Little Art, A Little Organizing, A Little Destruction...
Well, I have a few photos to share from the past few days.
 I got a few new paints this past week, and I had to make some room for them. Much reorganizing ensued, and this drawer got a serious makeover! This is the after picture, I didn't take one before!
 My new Gelli-printing plate has all kinds of potential, but my learning curve seems to be fairly steep. So, I joined a new group on Swap-Bot called The Print Shop, and it's all about Gelli print making! They have a swap up for some hand-made stencils, and this was my first effort. I found some fairly thick clear plastic and cut until I raised a blister. I drew the feather, then cut it with an exacto knife. I made two different attempts at it, and still didn't get it like I wanted it, but I think good enough for the swap. I will play with it some more when I can feel my finger again! :P
 My pen-friend Karen and I decided to do a private swap for a 5X7 card. This is what I made for her. All the inchies and twinchies (1 and 2 inch squares) are cut from my first set of Gelli prints, then I embellished them all and put them on a collage of vintage maps that I sprayed with some ink.
 This and the next ATC are both made on Gelliprint backgrounds. I had such a great response from the first one I made with the "violets" on it, that I made these for two different Swap-Bot swaps. The flowers are cut from a piece of sheet music I painted with twinkling H20 watercolors.

 Awhile back I made a master board (large collage to be cut into smaller pieces) and this was the last remaining ATC. I added quite a few little scraps, the "spunky" flag and some glass bead gel on the leaf, hat and little key part that is cut out of gold card at the bottom. It was snatched right up as soon as I posted it for trade. :)
 This ATC is on a background someone sent me in a swap. The little scalloped edge piece is the back of a note that came in another swap. I used ink and Fancy Pants rub-ons that I bought when a local scrapbook store went out of business about three or four years ago. Still trying to use up my stuff!
 This last piece is a 4X6 post card for a Swap Bot swap for red postcards. It has a lot of different pieces of printed and painted papers, washi tape, baker's twine, calendar photos, and all sorts of mediums applied, from crackle paint to liquid laminate, glitter, ink, acrylic paint and tiny silver glass beads.
As for the title's "destruction" here is my tale. Today I had to tackle the mound of dishes in the kitchen or face dire consequences. Apparently among the dishes was the cap for a jelly jar I had emptied a day or two ago. Did you know that jar lids and disposals are not compatible?! The disposal won, the lid is in the trash, the jar is topless (gasp!) and likely destined for the recycle bin. So sad. :(
As for the title's "destruction" here is my tale. Today I had to tackle the mound of dishes in the kitchen or face dire consequences. Apparently among the dishes was the cap for a jelly jar I had emptied a day or two ago. Did you know that jar lids and disposals are not compatible?! The disposal won, the lid is in the trash, the jar is topless (gasp!) and likely destined for the recycle bin. So sad. :(
Friday, January 24, 2014
Weaving paper and yarn
This week I have been trying to catch up. But, as the old saying goes, the faster I go, the behinder I get! So, I finally just quit trying and decided to play for a while. :)
 Violets ATC. Background is sheet music painted with twinks, violets punched from several layers of paper, topped with sheet music painted with twinks. Added washi tape (of course!) some liquid pearl in the flower centers and some scrapes through white acrylic paint with a credit card.
 This one is pieced from various papers I had either painted or received in swaps. The little houses are washi tape. I used some glitter gel pens to draw on the little flowers in the field, and some white acrylic on my finger around the edges. I am liking that messy edge look for some reason.
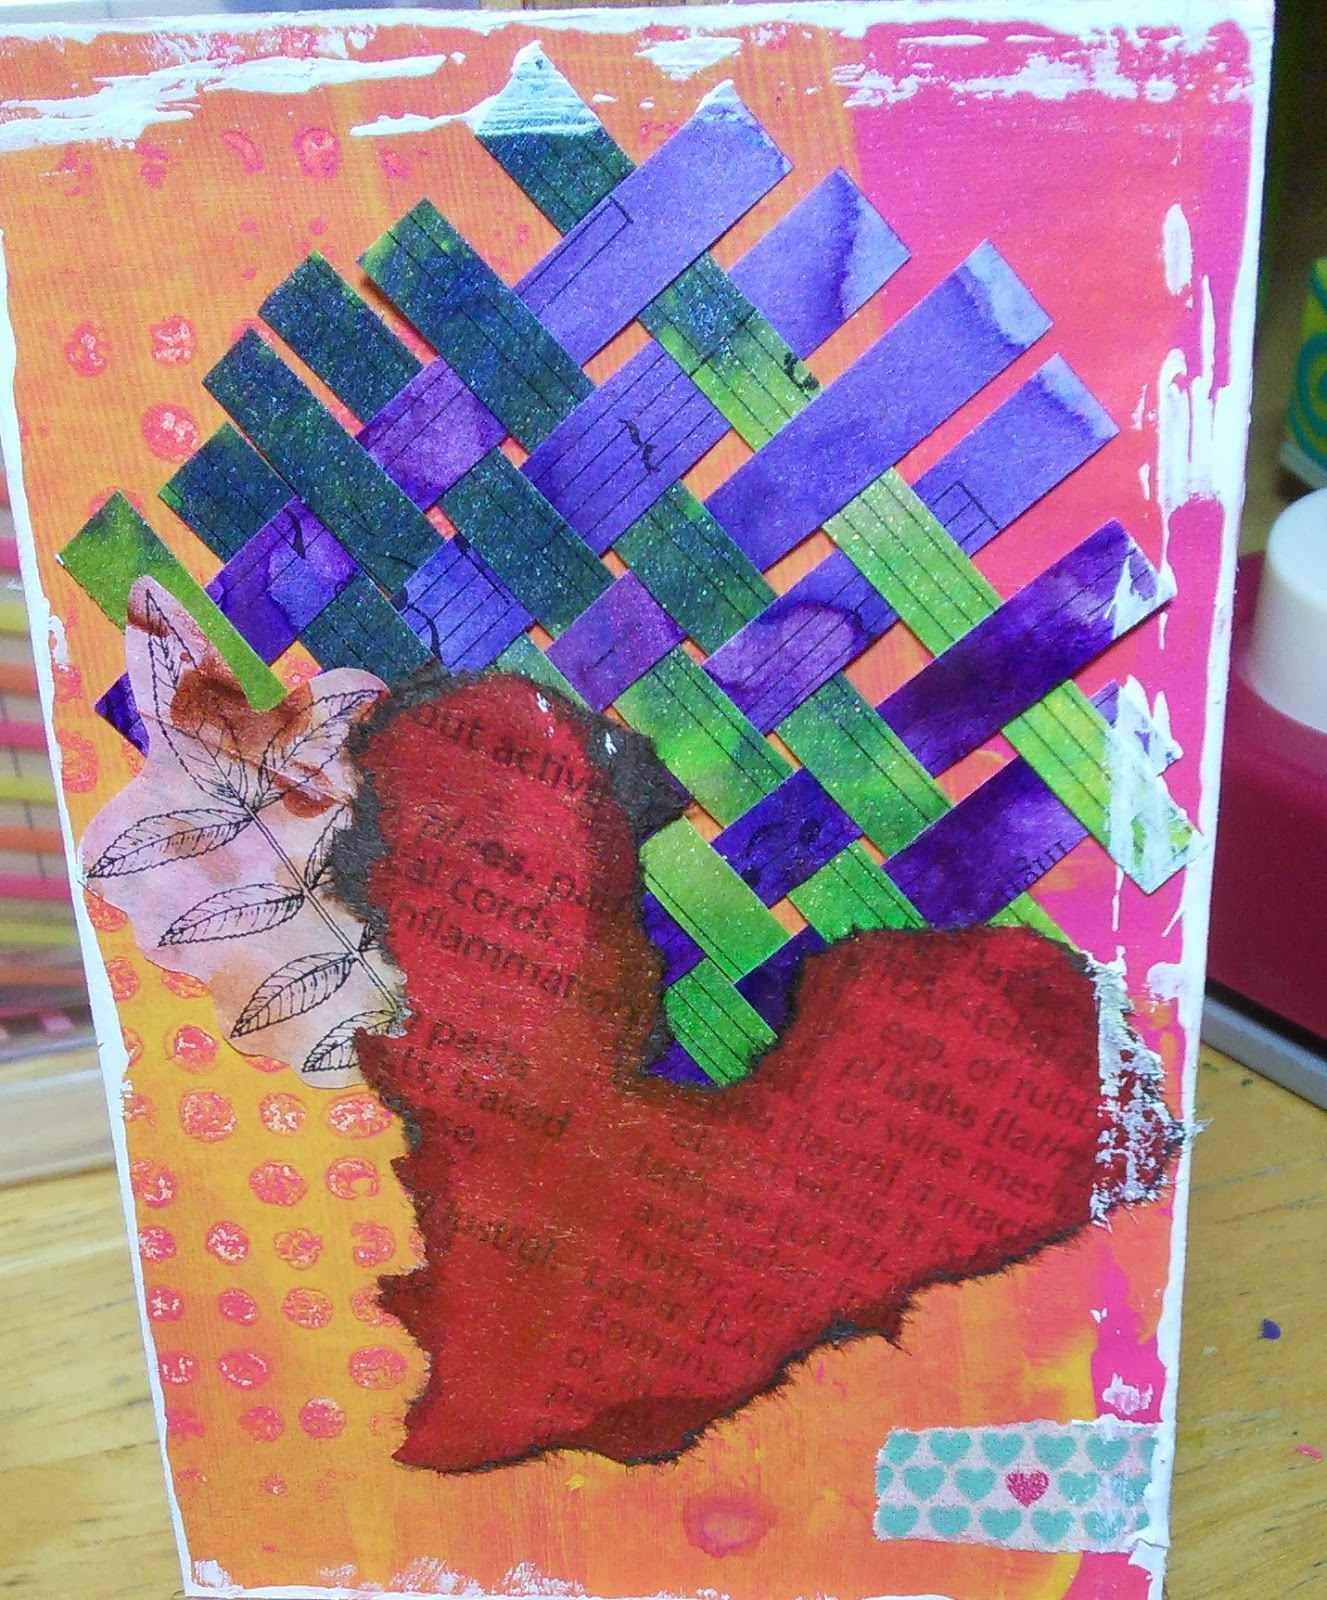 These two orange backgrounds were in a swap I received last week, and I was feeling the love for them when I was creating, so I used them in both backgrounds. The heart came as an extra in a swap with one of my favorite swappers, (Hi, Julie!) :) and I liked the look so well, I made a second one. Both swapped right away.
 The weaving on the ATCs above is from the edges of the sheet music I had painted. I use every last little scrap of those painted papers!!
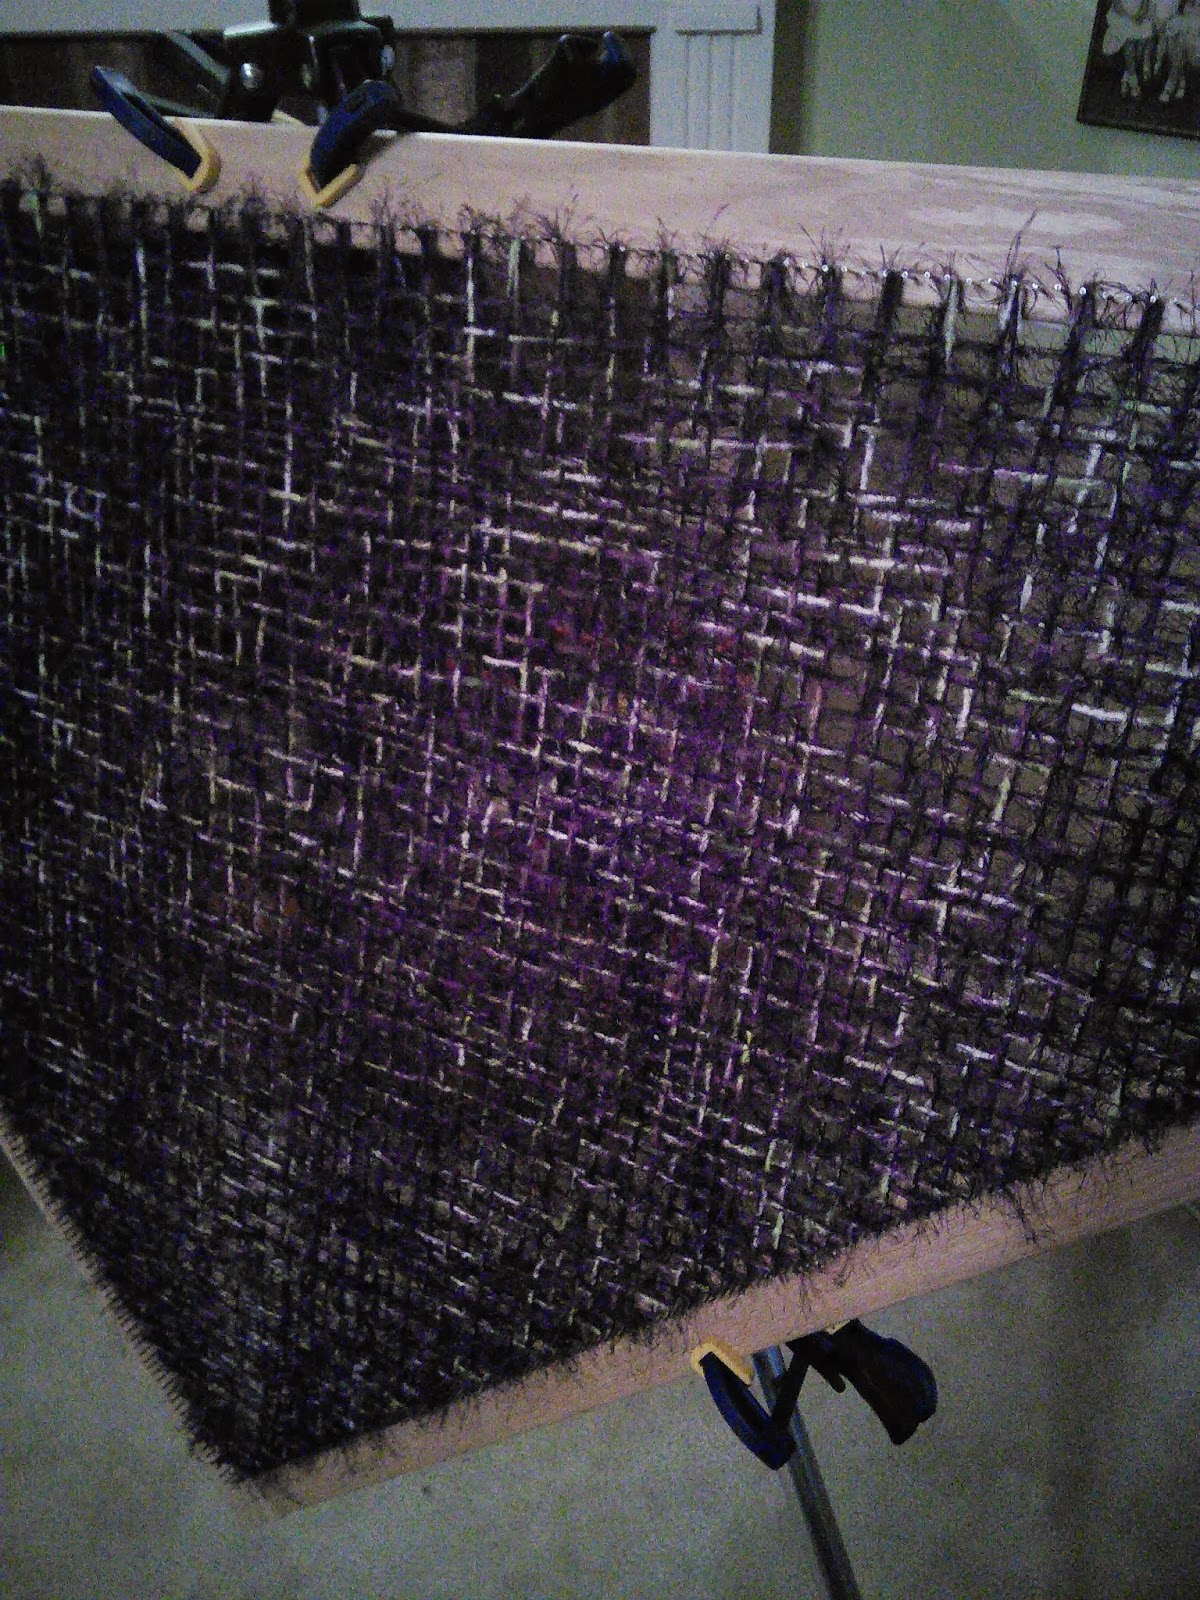
And, speaking of weaving, Elizabeth whipped out this shawl for my sister Mimi in no time at all! It was difficult because she had to hand weave every line (as opposed to using her long hook) but it went so fast because she skipped two nails each pass, that it was only on the loom three days! She only works on these when she comes for coffee in the morning and after she eats lunch, so about an hour a day.

The yarns are purple eyelash and ombre bamboo with purple and chartreuse streaks in it. Here is a close up of the weave.
 And, here is the finished product. No fringe was needed as the hairy yarn does a nice job of finishing it off.
And, speaking of weaving, Elizabeth whipped out this shawl for my sister Mimi in no time at all! It was difficult because she had to hand weave every line (as opposed to using her long hook) but it went so fast because she skipped two nails each pass, that it was only on the loom three days! She only works on these when she comes for coffee in the morning and after she eats lunch, so about an hour a day.
The yarns are purple eyelash and ombre bamboo with purple and chartreuse streaks in it. Here is a close up of the weave.
Sunday, January 19, 2014
This Week's Art
My dream of regular posts here on my blog has not really come to fruition as I had hoped, but here I am with a little art update. Hopefully by the end of today I will have another post ready with a little garden room update, because I am sure you are waiting with baited breath to see our progress! :)
 This first piece is 6X9 inches. It started out as the back cover for the last art journal I made, but was too thick to go into the machine that punches the holes for a spiral bound book. So, since it was already taped and paper covered, I decided to make it into something else. I had signed up for a "letter writing project" that turned out to be anything BUT letters, and my partner in that was the recipient of this bit of collaged mixed media. She said it was, "the most beautiful thing anyone had ever given her." Made me happy that she liked it! :)
 These six Artist Trading Cards (ATCs) are for a "jam" or "round robin" where three artists collaborate, then each one ends up with two completed cards in the end. The first is a young man in Michigan with whom I have been swapping ATCs for a couple of months. Great guy! I put on the second layer, then sent them on to a pen-friend I met on Instagram with whom I am doing all sorts of swaps including both art journals I have sent off!
 This is one of two ATCs (both shown below) I made for a swap-bot swap with a Valentine's Day theme.

 The Facebook group I am part of (Mixed Media ATC Artists) does two swaps per month. This one is Red or Pink with a heart. We make three cards to swap, this and the next two are my offerings for this swap.


 One of my Instagram friends is a teacher in Neosho, MO, and is doing a handmade postcard swap with several of her students 5th-8th grade. She asked for volunteers who would be willing to swap with the kids, so I did this one. I recycled the cover of a calendar I received from my daughter who faithfully brings me all sorts of
 crap wonderful crafting materials. :)
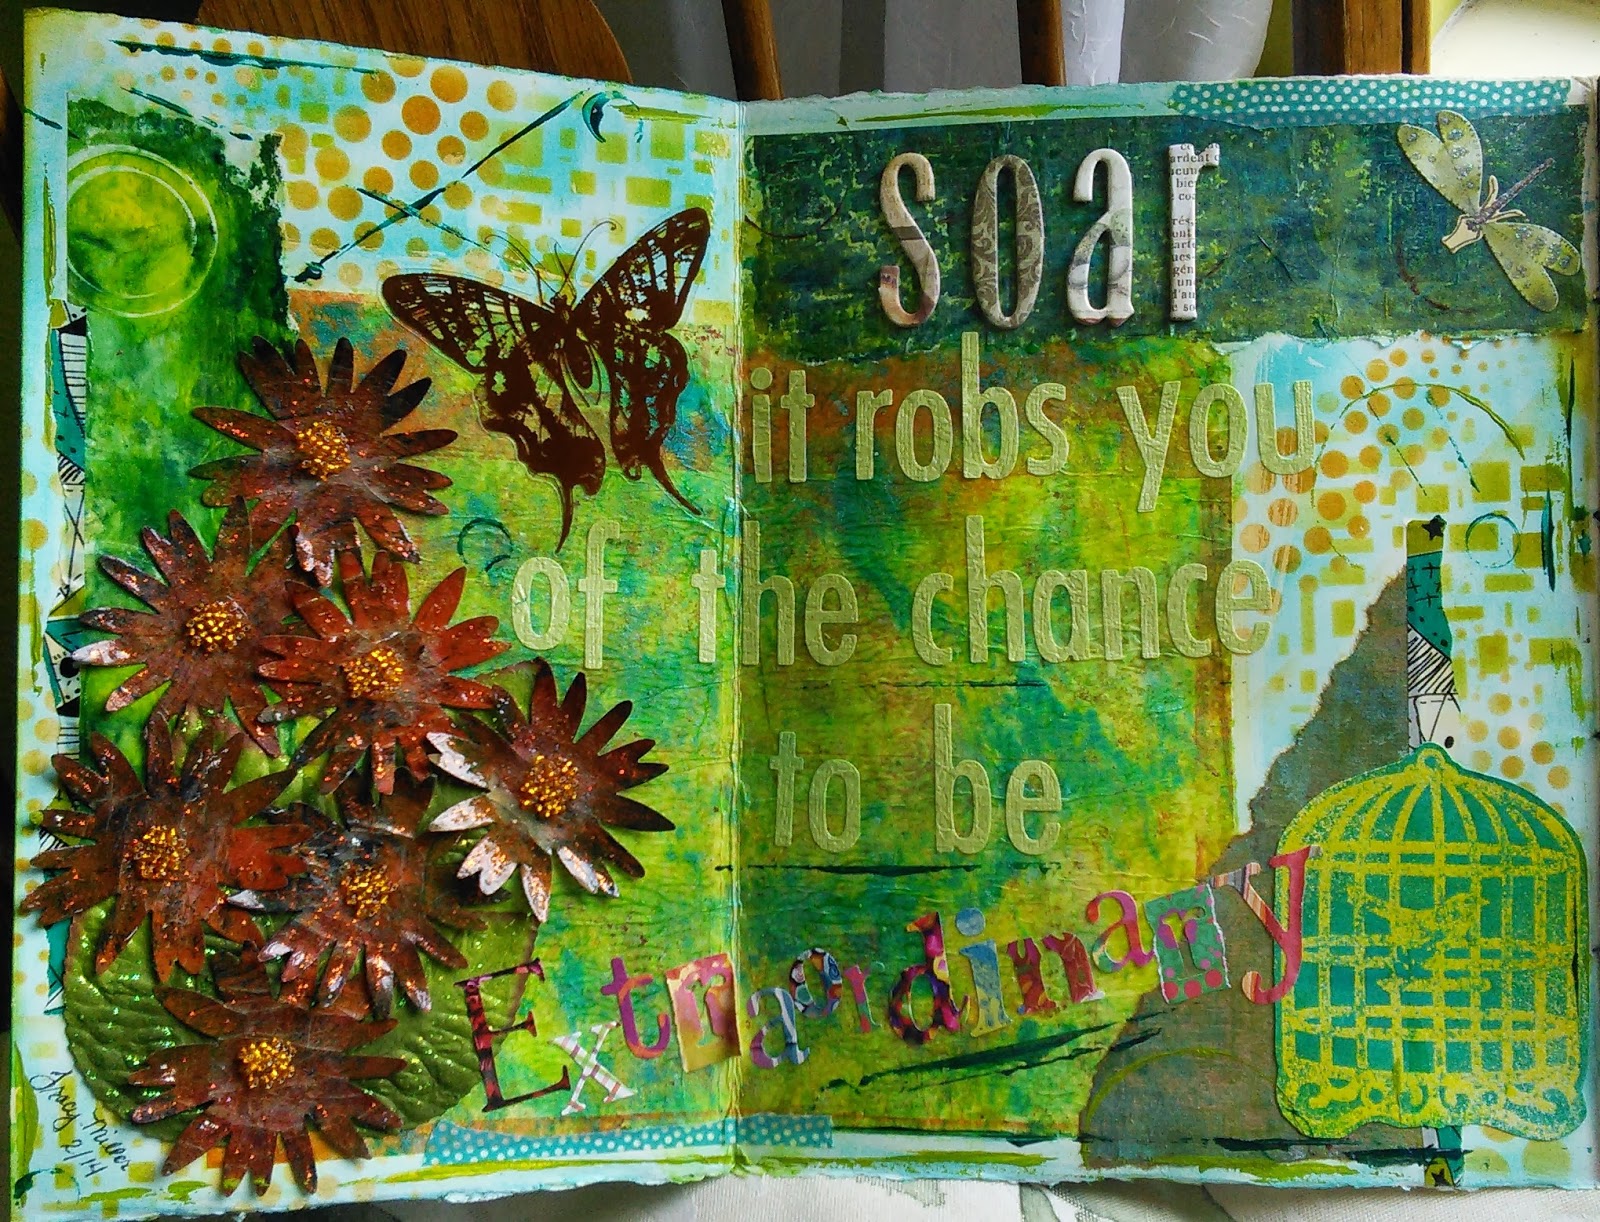
 This picture is my first art journal page in one of the traveling journals I am participating in. The owner of the journal likes purple and blue, butterflies and outdoors. It was a tremendous learning experience for me, and while it was not what I would have made had I known at the beginning what I learned in the process, I think she will be happy with it.
 And, lastly, more giftings from Elizabeth (Victoria Secret packaging) turned into post cards. I covered them with vintage maps, used washi tape, modeling paste, some new stencils, embossing powder, Dylusions inks, Stickles Glitter, some stamped tissue paper I got in a swap, embroidery floss and found letters. One is a thank you card for a RAK I received in November, and the other is for a mail art swap.
I took these postcards to the Post Office to make sure I had sufficient postage on them, and Ornery brought the boxed mail up to the counter while I was there. Apparently there had been wild speculation among the postal employees as to who the recipient of all the wildly decorated mail was. :) I think they were disappointed that I was just an ordinary patron, not some Casanova with lots of girlfriends from all over the world. :D However, they seemed to be enjoying all the colorful mail I get. Sadly, they don't get to see much of the wild stuff I send out!
I took these postcards to the Post Office to make sure I had sufficient postage on them, and Ornery brought the boxed mail up to the counter while I was there. Apparently there had been wild speculation among the postal employees as to who the recipient of all the wildly decorated mail was. :) I think they were disappointed that I was just an ordinary patron, not some Casanova with lots of girlfriends from all over the world. :D However, they seemed to be enjoying all the colorful mail I get. Sadly, they don't get to see much of the wild stuff I send out!
Subscribe to:
Posts (Atom)